Organizing & Managing the Classroom
On average, most teachers spend 8-10 hours a day in their classroom, which is more time than some spend at home with their own families. I always compared my classroom to that of an apartment, where I spend most of my time. I wanted it to look inviting, organized, and beautiful for myself and my guests, aka, my students, so the management, organization, and looks of my classroom are extremely important. These key components allow your classroom to be ready for teaching and learning.
Strict vs Structured
Teachers have been known to be either strict or structured. Not that either strict or structured or both, is a bad thing to be. However, the need for a comparison of the two terms should be made clear. By Webster’s definition, strict means stringent in requirement or control under strict orders; severe in discipline. I often related the term strict to what someone says you can and cannot do. Structured means something is arranged in a definite pattern of organization. A classroom that is structured is very important in managing and organizing an effective classroom. Rules are in place that limit what kids can and cannot do to keep others safe but structure provides an organization and routine that produces an environment that is conducive for children to learn. A safe environment that is structured is a perfect balance.
 A Structured Classroom:
-
Establish rules and routines from the get-go
-
Establish a classroom community of respect (See Responsive Classroom resources)
-
Establish clear expectations and consequences
-
Establish clear learning goals
-
Provide flexibility
-
Show interest in your students
-
Develop relationships with students and their families
If you do not have effective classroom management, your students will not learn to their highest potential. Once you have the management down pat, you will love teaching and your students will love learning.
The Physical Space
Organizing the physical space is another important piece of the classroom. It should be a place that is organized, inviting and makes the best use of the classroom space. I have a lot of experience working with physical space. Not only am I an HGTV addict that watches endless hours of all the home shows, but I was also moved to 6 different classrooms in 12 years. By the time I got used to a classroom’s physical space and got it the way I wanted it for both myself and my students, I was on my way to a different classroom to figure it all out again.
Classrooms come in all shapes and sizes and I was completely bummed when I had a small, stuffy room that was not conducive for 20-25 bodies to move around in without bumping into each other. Students having their personal space is just as important as the physical space. Hopefully, your classroom has closets and cabinets. But if you were like me, mine did not have either so I had to find a way to store resources and materials in the best way possible that was accessible and organized. I mostly used plastic bins and stacked them into spaces that I call “dead” spaces, like behind a classroom door or in a tight space that my students could not utilize. I also used shelves for storage and stacked them with bins. Every bin had a place and every bin had a label. Once the space is clearly organized at the beginning of the school year, students know exactly where to find things, and where to put things and will know that classroom like the back of their hand. It’s smooth sailing from there!
 An Organized Classroom:
-
Create a student-friendly environment that is inviting and welcoming.
-
Carefully define and separate your students’ space from the teacher’s space.
-
Identify spaces that will be utilized for teaching and learning, for whole group teaching, small groups, work areas, centers, etc.
-
Identify “dead” spaces to be used for storage areas.
-
Teach students about the physical space. Teach students that everything in the classroom has a space and a place, like their personal belongings, classroom materials, and resources.
-
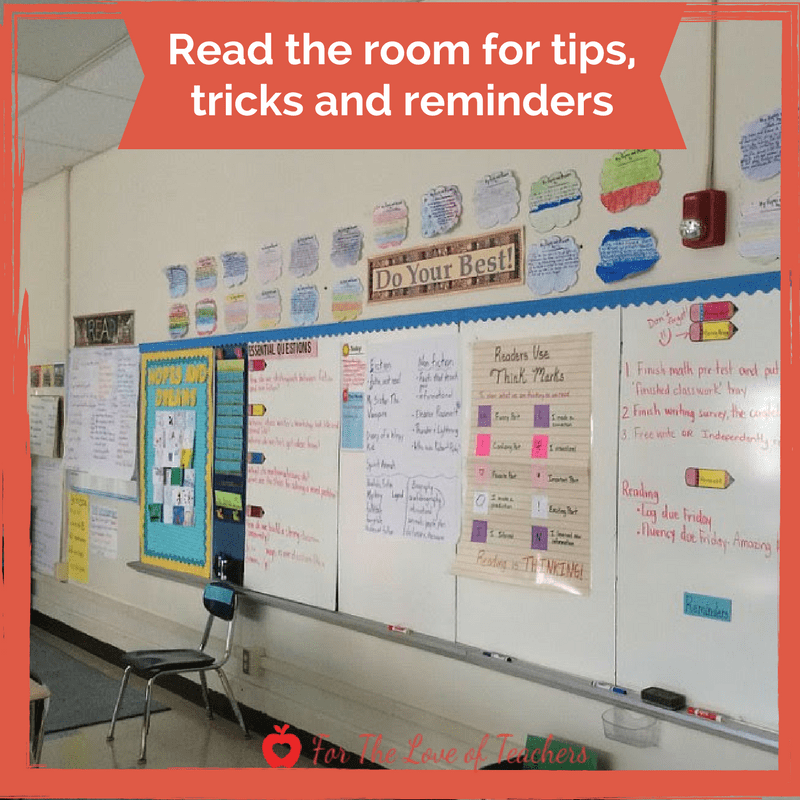
Label everything, including bins and shelves, materials, and resources. Your students could then “read” the room if they forget where something is or goes.
-
Update the classroom display spaces, such as student work on bulletin boards.
One of my favorite resources for classroom organization is
Classroom Spaces That Work . Check it out!
Organizing and Managing
Academic Learning Centers
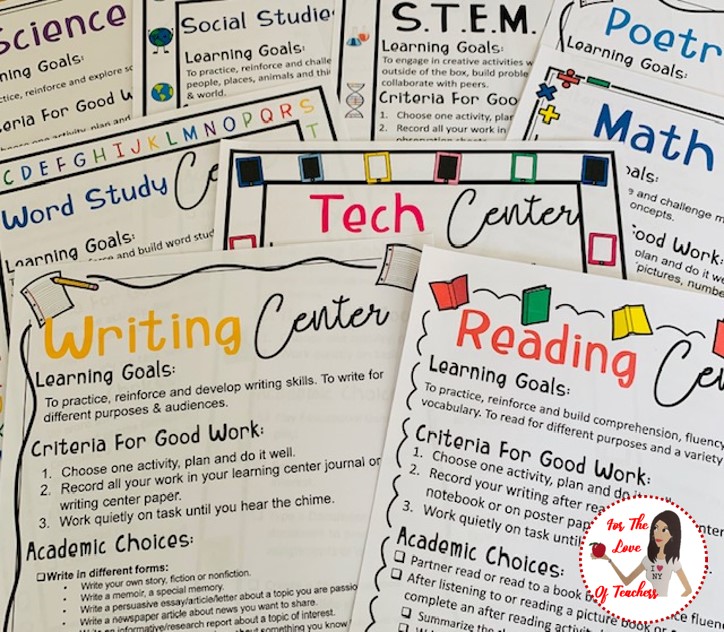
When a teacher meets with a small group, other students work in the various learning centers in the classroom. Some examples of academic learning centers include poetry, writing, word study, research/computer, library, listening, social studies, science, STEM, and math. Students working in learning centers take responsibility for their learning and record their learning in their learning center journals.
Learning centers foster:
-
academic choice and exploration
-
both independence and collaboration with peers
-
strengthening and challenging skills
-
practice of skills
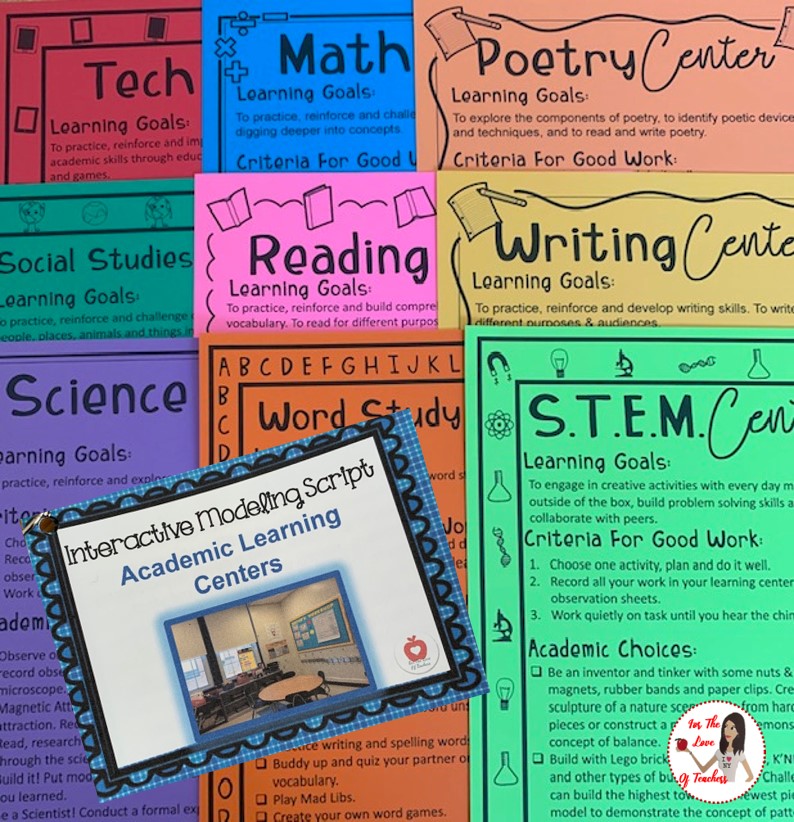
Grab this Modeling Script along with Learning Center Task Posters to model and teach Academic Learning Centers here.
Center Task Posters:
-
Display in each center
-
Modify activities for grades and units of study
-
Set up materials for each activity
Grab these EDITABLE task posters to put in each center at student eye level to encourage independence and academic choice in your classroom. Get them here.
Setting Up Learning Centers
Anything related to the subject area and units of study you are teaching in the classroom can go into your centers. Make the centers attractive and engaging for students. Of course, kindergarten centers would look very different from fifth-grade centers.
For example, when I was teaching a 3rd-grade science unit on Rocks and Minerals, my science center was set up with books about rocks and minerals to read, learn and record from. There were sets of rocks and minerals to observe with magnifying glasses. There were puzzles and games related to rocks and minerals.
Here are some more ideas for your academic learning centers:
Writing – books about writing, this could include picture books (Eats, Shoots & Leaves: Why Commas Really Do Make a Difference! ) colored pencils, “fancy” paper, lined paper, letter writing paper, make a book station that includes all papers to make a book (table of contents, glossary, index, about the author page, etc), construction paper or drawing paper, etc.
Poetry– books about poetry, books from famous poets (Where the Sidewalk Ends: Poems and Drawings by Shel Silverstein is a favorite), pens, pencils, lined paper, construction paper or drawing paper, highlighters, etc.
Library/Reading – A large variety of books from fiction to non-fiction, picture books to chapter books in all genres, including book project ideas, paper, pencils, etc.
Listening Center – books on audio in different genres, listening center reports, paper, pencils, etc.
Word Study – word study games (Hasbro Scrabble Crossword Game ), word unscrambles, word searches, crosswords, Mad Libs, word sorts, phonics activities, flashcards, etc.
Math – manipulatives- unifix cubes, snap cubes, pattern blocks, tiles, dominoes, math games, and activities, flashcards, clocks, base ten pieces, dice, counters, fraction pieces, coins and dollars, geometric solid figures, math project ideas (create a math game), sprints, timers, STEM activities, etc.
Science – books about units of study or areas of interest, objects to observe, recording sheets, STEM activities, models to build, games and activities, experiments, etc.
Social Studies – books about units of study, areas of interest, people and places, maps, puzzles, games, activities, etc.
 Organizing and Setting Up Centers
-
Look at the physical space of the classroom. Setting up centers often work best along the perimeter of the classroom with nooks for student workspace. Sometimes students would work at a table in front of the center shelves or on a carpet.
-
Display materials on shelves. Label shelves with center materials and activities.
-
Provide materials and resources related to center content and grade level.
-
Replenish center materials and activities as needed.
-
Add different activities to keep it fresh and inviting.
-
Displays anchor charts and wall displays that reinforce the skills and strategies that you are teaching.
-
Keep track of your centers by using a pocket chart. The pockets should say the center name, include a center picture, and the number of how many students could “fit” in that center. I had an index card with each student’s name on it and on the back of the card, I kept track of which centers they went into each day.
How Many Students Per Center?
Organizing how many students work in each center depends on your class size and the organization of centers. In my writing/poetry center, I only had a table that could fit four students, so I would assign 2 students to the writing center and 2 students to poetry. I had a table that fit 6 students for the science and social studies center, so I assigned 3 students to science and 3 students to social studies. I had a carpet that was big enough for 4-5 students in the library center. I had a table large enough for 6 students to work in the math center, etc. You need to be able to fit all of your students into a center minus the students you will be meeting within a small group.
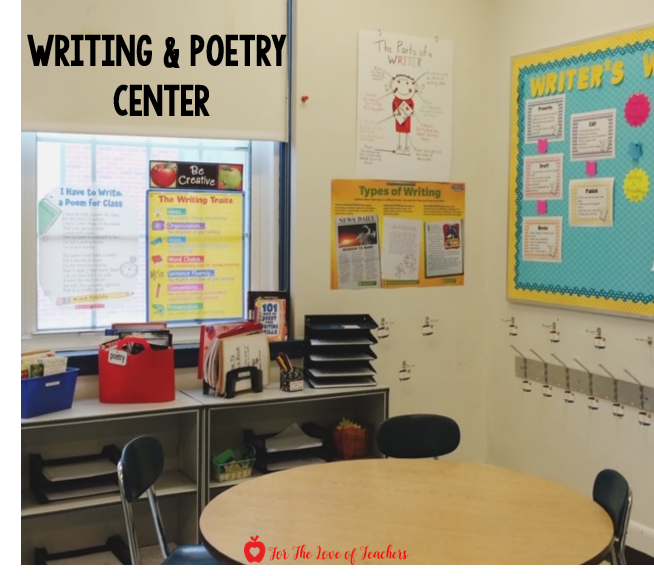
Writing & Poetry Center- 4 students
